
NLP: Twitter Sentiment Analysis (3): Plot the Word Cloud
- Sep 14, 2023
- 3 min read

Welcome to NLP: Twitter Sentiment Analysis (3)!
Project summary:
In this series, NLP: Twitter Sentiment Analysis, we're going to train a Naive Bayes classifier to predict sentiment from thousands of Twitter tweets.
This project could be practically used by any company with social media presence to automatically predict customer's sentiment (i.e.: whether their customers are happy or not).
The process could be done automatically without having humans manually review thousands of tweets and customer reviews.
Let's go.
1. Create dataframe for positive tweets
To create a new dataframe selecting only tweets with label 0 (positive) and view it, type:
positive = tweets_df[tweets_df['label'] == 0]
positive
▲ tweets_df create a new dataframe which contains only the rows with label 0.
It then assigns to variable positive.
Next time when we type positive as a single command, we can view the dataframe which contains only positive tweets.

(Result)
▲ We can see the dataframe shows only rows with label 0.
2. Create dataframe for negative tweets
Next, we're going to create a new dataframe selecting only tweets with label 1 (negative) and view it, type:
negative = tweets_df[tweets_df['label'] == 1]
negative
▲ tweets_df create a new dataframe which contains only the rows with label 1.
It then assigns to variable negative.
Next time when we type negative as a single command, we can view the dataframe which contains only negative tweets.

(Result)
▲ We can see the dataframe shows only rows with label 0.
3. Put all tweets into a list
Before ploting the word cloud, we first extract all tweets and put it into a list, and check its length to ensure it's done:
sentences = tweets_df['tweet'].tolist()
len(sentences)
▲ tweets_df['tweet'] calls tolist() function to put all tweets into a list.
It then assigns to variable sentences for convenience to call it later.
len(sentences) shows the length of the list to ensure all tweets are included.

(Result)
▲ As the number matchs the total amount of tweets, we know that all tweets are included in the list.
4. Join all tweets into a single sentence
To be processed into word cloud, the data should first be transformed into a single sentence/ string:
jointSen = " ".join(sentences)
jointSen
▲ join() function first joins all sentences together into one string. " " is a delimiter meaning that there should be a blank space " " between each sentence.
It then assigns to variable jointSen.

(Result)
▲ We can see jointSen contains thousands of tweets in a single string.
5. Plot the word cloud
Then we can start create a word cloud! But first, we need to install the word cloud module:
!pip install wordcloud▲ !pip install means to install wordcloud library in Python. (Yes, wordcloud is one of the libraries in Python.)
Then, import Word Cloud class and generate a word cloud using the one-sentence-tweets that we just created. Also, as wordcloud only creates the image array of word cloud, it does not render the actual image. Thus, we need to call matplotlib to render the image:
from wordcloud import WordCloud

plt.figure(figsize = (20, 20))
plt.imshow(WordCloud().generate(jointSen))
▲ We import WordCloud class/object from wordcloud library.
Use matplotlib plt to call figure() function to build a canva for ploting the word cloud.
figsize defines the size of the canva in inches.
WordCloud() creates an empty word cloud object.
generate() returns an image array of the word cloud by jointSen data.
Use matplotlib plt again to call imshow() function to render and display the image array into an actual image.

(Result)
▲ Here's our first word cloud!
Of course, this is not the final version.
See the weird symbol and text inside?
We need to perform data cleaning in the next chapter.
6. (Optional) Plot only the negative word cloud
Ok, annoyed by the overpositive word cloud above? Let's do a negative one:
negativeList = negative['tweet'].tolist()
negativeJoint = " ".join(negativeList)
plt.figure(figsize = (20, 20))
plt.imshow(WordCloud().generate(negativeJoint))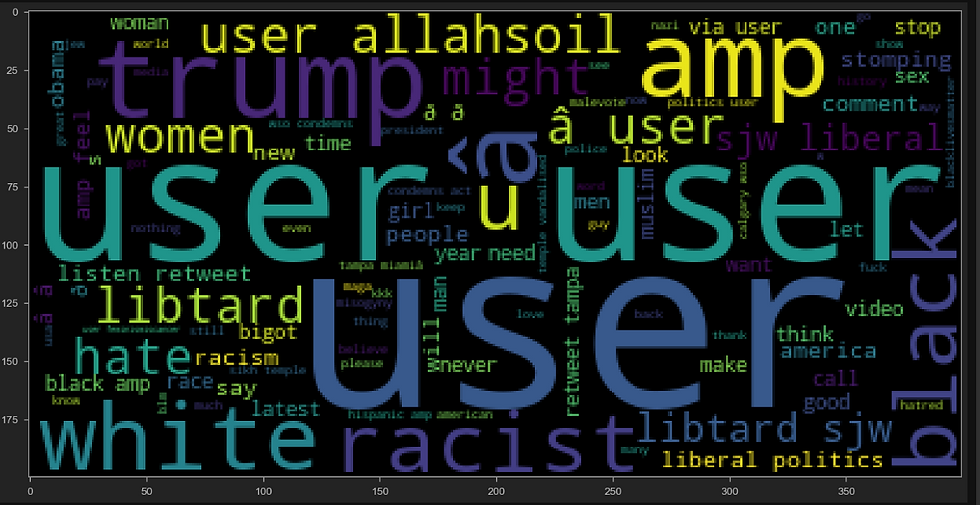
(Result)
▲ Satisfied? See the keywords...
Congratulations on completing this tutorial!
Remember, learning is a journey, and it's okay to encounter bumps along the way.
See you in NLP: Twitter Sentiment Analysis (4)!
© 2023 Harmony Pang. All rights reserved.


Comments